

- 81 Views
- 26 Min Read
- (0) Comment
Unlocking the Art of Safari Photography
Want to capture stunning wildlife photos on your next safari? This listicle provides seven essential safari photography tips to help you take incredible images. Learn how to choose the right lenses, master the golden hour light, optimize your camera settings for action shots, and improve your composition for storytelling. We'll also cover essential supporting equipment, the importance of patience and observation, and post-processing techniques for impactful wildlife photos. Whether you're a beginner or experienced photographer, these safari photography tips will help you preserve the magic of your adventure.
1. Use the Right Lenses
Capturing breathtaking wildlife photography on safari hinges on choosing the right lens. The vast landscapes and elusive nature of African wildlife demand specialized equipment that allows you to shoot from a safe distance without disturbing the animals or compromising image quality. This is why selecting the correct lens is arguably the most crucial of all safari photography tips. Your lens choice will dictate the quality of your images, the range of shots you can take, and ultimately, your overall safari photography experience.
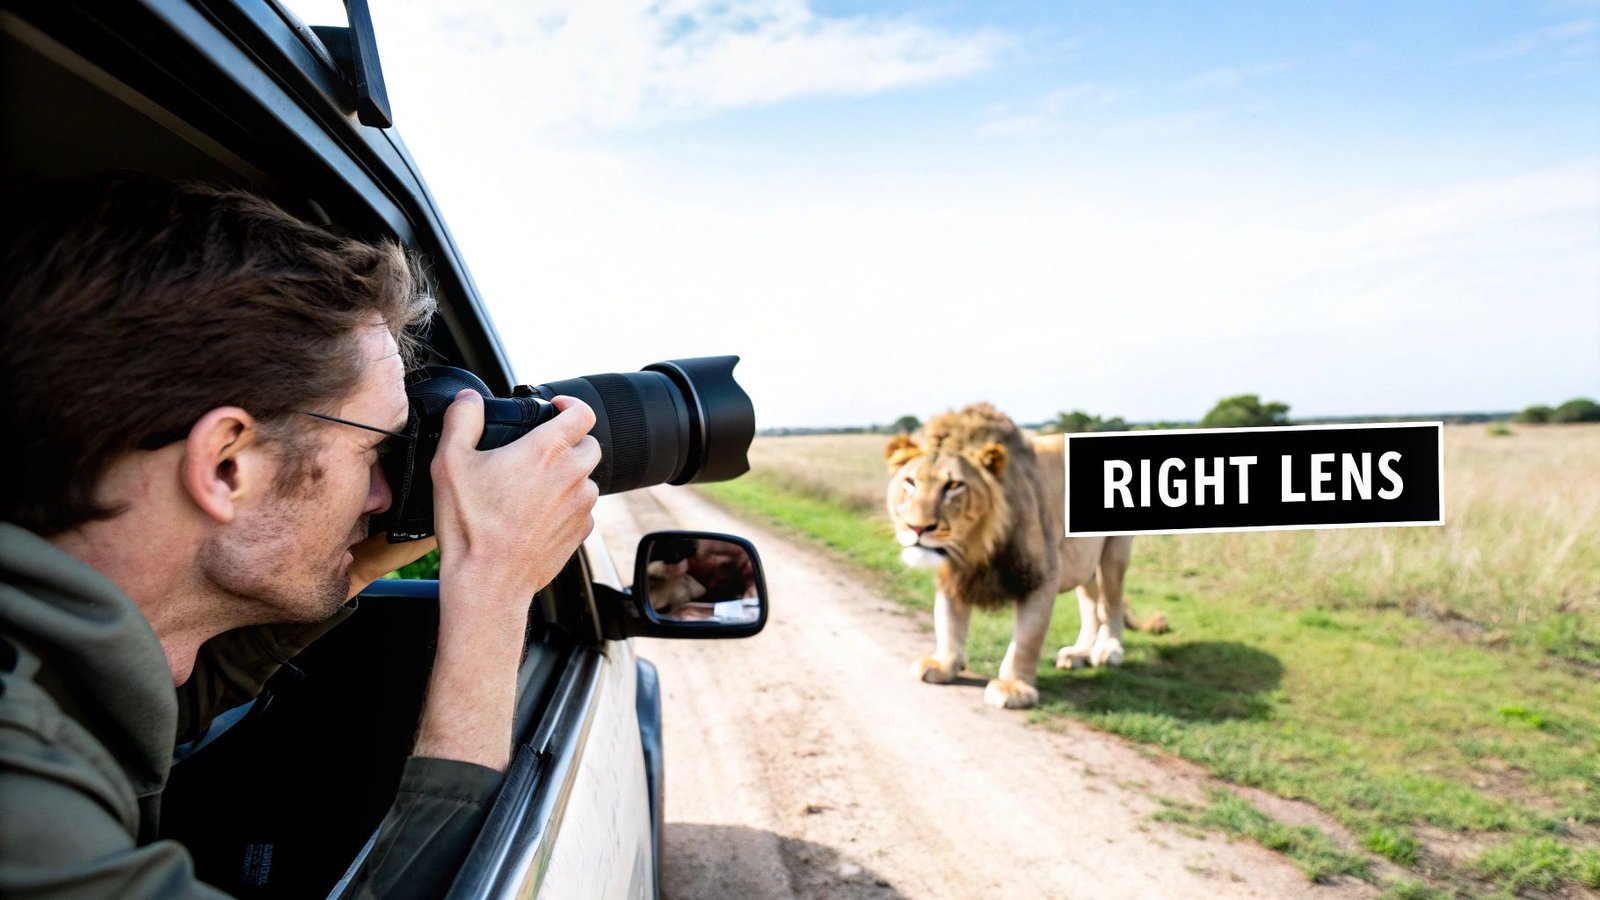
Telephoto lenses are the cornerstone of safari photography. These lenses, typically in the 200-600mm range, allow you to zoom in on distant subjects, capturing intimate details like a lion's focused gaze or the delicate markings on a bird's wings. The ability to magnify distant subjects not only provides incredible close-ups but also plays a vital role in ethical wildlife viewing, ensuring a safe distance between you and the animals. For a deeper dive into lens selection, you can learn more about Use the Right Lenses.
Features to look for in a safari telephoto lens include image stabilization (crucial for shooting from moving vehicles), fast apertures (f/2.8-f/5.6 for better low-light performance and background blur), weather sealing (to protect against dust and moisture), and compatibility with teleconverters (to further extend the lens's reach).
Examples of Successful Implementation:
- Capturing a lion's detailed facial expression from 50 meters away: This demonstrates the power of a telephoto lens to capture intimate details from a safe and respectful distance.
- Photographing birds in flight with a 400mm lens: A telephoto lens with a fast autofocus system is essential for capturing sharp images of fast-moving birds.
- Shooting elephants at sunset with compression that emphasizes their size: Telephoto lenses create a compressed perspective, making distant objects appear closer together and enhancing the sense of scale, particularly impactful with large animals like elephants.
Pros of using telephoto lenses:
- Ability to capture distant wildlife safely
- Create compression that isolates subjects from backgrounds
- Capture fine details of animals
- Avoid disturbing natural behavior
Cons of using telephoto lenses:
- Expensive and heavy to carry
- May require a tripod or monopod for stability
- Limited field of view
- Challenging to use in low light without high ISO
Actionable Tips for Safari Photography:
- Bring at least one telephoto lens in the 200-600mm range. This will be your workhorse lens for the majority of your safari photography.
- Consider a zoom telephoto for flexibility (like 100-400mm). A zoom lens provides versatility for capturing a wider range of subjects and compositions.
- Use a lens with image stabilization for sharper images from moving vehicles. Safari vehicles often traverse bumpy terrain, making image stabilization essential for minimizing blur.
- Pack a teleconverter to extend reach without carrying multiple heavy lenses. A teleconverter can effectively increase the focal length of your lens, giving you extra reach when needed.
- Practice with your telephoto lens before the safari to master focusing techniques. Familiarize yourself with your equipment to ensure you're comfortable and confident using it in the field.
The use of appropriate lenses has been popularized by renowned wildlife photographers featured in publications like National Geographic, including iconic figures such as Art Wolfe and Frans Lanting. The development and advancement of super-telephoto lenses by companies like Canon and Nikon have further revolutionized the field of wildlife photography, enabling photographers to capture stunning images that were previously impossible.
2. Master the Golden Hours
Capturing breathtaking safari photographs hinges on understanding light, and there's no better light than that found during the golden hours. These magical periods, occurring shortly after sunrise and before sunset, dramatically enhance your safari photography. The sun sits low in the sky, bathing the landscape and its inhabitants in a warm, directional light that transforms ordinary scenes into stunning works of art. This soft, diffused light minimizes the harsh shadows characteristic of midday sun, revealing rich colors and textures often lost in the glare. The lower contrast also provides opportunities for dramatic backlighting, creating silhouettes and highlighting dust particles in the air for an added touch of magic. This is why mastering the golden hours is an essential safari photography tip.
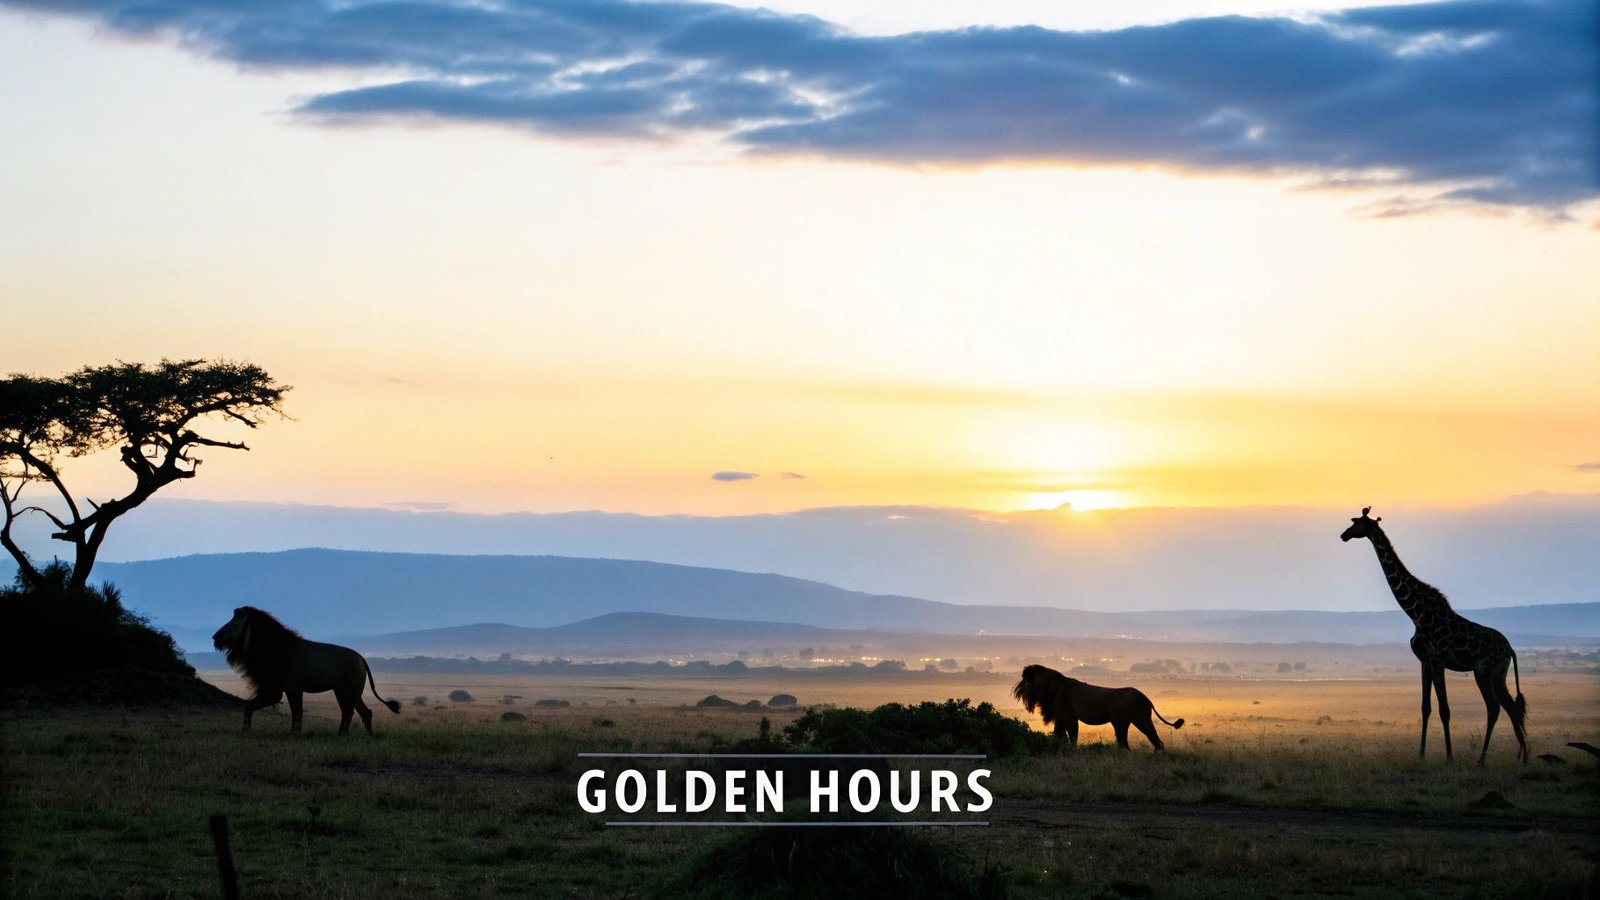
The golden hours are more than just aesthetically pleasing; they also often coincide with peak animal activity. Many animals are most active during the cooler temperatures of early morning and late afternoon, giving you more opportunities to capture them in their natural habitat. Imagine a pride of lions basking in the warm glow of the morning sun, or the silhouettes of giraffes against a fiery orange sunset sky. Perhaps you'll witness elephants crossing a river, their majestic forms reflected in the golden water. These are the moments the golden hours can deliver. Learn more about Master the Golden Hours The features of this special light – warm directional rays, soft shadows, rich colors, and lower contrast – combine to create breathtaking images. This flattering light reduces the harsh shadows of the midday sun and brings out the vibrant colors of the African landscape and its wildlife.
While the benefits are undeniable, the golden hours do present some challenges. The short time window necessitates early wake-up calls and careful planning. The lower light levels may require higher ISO settings on your camera, potentially introducing some noise into your images. Additionally, the golden hour's magic is weather-dependent; overcast skies can mute the effect.
Pros:
- Creates mood and atmosphere
- Flattering light for animals
- Reduces harsh shadows of midday sun
- Produces vibrant colors
- Often coincides with increased animal activity
Cons:
- Very limited time window each day
- Requires early wake-up calls and late evenings
- Low light may require higher ISO settings
- Weather dependent
Tips for Mastering the Golden Hours:
- Plan your game drives around sunrise and sunset times. Check with your lodge or guide for accurate timings.
- Be ready with your camera settings before the golden hour begins. This will ensure you don't miss those fleeting moments of perfect light. Practice adjusting settings beforehand.
- Shoot in Aperture Priority mode (Av or A) to quickly adjust depth of field. This allows you to control how much of your image is in focus, isolating your subject from the background.
- Position yourself with the sun at your back or for side-lighting. This will illuminate your subject beautifully.
- Consider silhouettes when shooting towards the sun. This can create dramatic and artistic images.
- Use exposure compensation to fine-tune your exposure. The changing light during these times requires constant adjustments to ensure proper exposure.
The power of the golden hours has been embraced by renowned wildlife photographers like Jonathan Scott and documented in captivating series like the BBC's Planet Earth. Photographers like Beverly Joubert and Greg du Toit have also showcased the magic of these fleeting moments, demonstrating their crucial role in capturing truly stunning safari images. By understanding and utilizing the golden hours, you too can elevate your safari photography from snapshots to captivating masterpieces.
3. Optimize Camera Settings for Wildlife Action
Capturing stunning wildlife photos on safari requires more than just pointing and shooting. Animals are unpredictable and often fleeting, making quick reactions essential. Optimizing your camera settings for wildlife action is crucial for freezing those decisive moments and bringing home compelling images. This is why it's a vital element of any successful safari photography trip. By understanding how to configure your camera, you'll be prepared to capture the magic of the African bush or any other wildlife-rich environment. Learn more about Optimize Camera Settings for Wildlife Action
Wildlife photography often demands speed and precision. A lioness charging across the savanna, a bird taking flight, or a fleeting glimpse of a leopard through dense foliage – these are moments that require your camera to be ready. This is where understanding and utilizing features like fast shutter speeds, continuous autofocus, and burst shooting becomes essential for capturing the action.
Key Features for Wildlife Action:
- Fast Shutter Speeds: Crucial for freezing motion, especially with fast-moving animals. Think 1/1000th of a second or faster, depending on the subject and lighting conditions.
- Continuous Autofocus (AI Servo/AF-C): This setting allows your camera to continuously adjust focus as your subject moves, ensuring sharp images even when the animal is running or flying.
- Burst Shooting Mode (Continuous High): Capture a sequence of images with a single press of the shutter button, increasing your chances of getting the perfect shot within a fast-moving sequence. Aim for 8 frames per second (fps) or higher if possible.
- Auto ISO with Minimum Shutter Speed: Allows the camera to adjust the ISO automatically to maintain a chosen minimum shutter speed, crucial in changing light conditions. This helps prevent motion blur while maintaining a reasonable ISO level.
- Back-Button Focusing: Separates the focus function from the shutter button, providing greater control over focusing and recomposing your shots, particularly useful for moving subjects.
Pros and Cons:
| Pros | Cons |
|---|---|
| Captures sharp images of moving animals | Higher shutter speeds may require higher ISO |
| Prevents motion blur | Continuous shooting fills memory cards quickly |
| Increases chance of getting the perfect moment | Learning curve for advanced focusing techniques |
| Reduces missed shots | Battery drain from continuous shooting |
Examples of Successful Implementation:
- Freezing a cheetah in full sprint at 1/2000 sec.
- Capturing the perfect wing position of a bird taking flight.
- Getting the exact moment of a predator-prey interaction.
Actionable Tips for Safari Photography:
- Use shutter speeds of 1/1000s or faster for action.
- Set your camera to continuous autofocus (AI Servo/AF-C).
- Enable back-button focus for better control.
- Use burst mode (8+ fps if possible).
- Set Auto ISO with a minimum shutter speed floor (e.g., 1/500s).
- Learn to pan with moving subjects to create a sense of motion.
- Practice tracking moving subjects before your safari.
- Consider setting up custom modes for different scenarios (e.g., birds in flight, mammals in motion).
Influential Figures and Technology:
Wildlife action photography has been popularized by photographers like Andy Rouse. Camera technology, especially advanced autofocus systems like those found in Canon's 1D series and Nikon's D5/D6, and Sony's Eye-AF technology, have revolutionized the ability to capture sharp images of wildlife in motion.
By mastering these camera settings and techniques, you'll be well-equipped to capture stunning images of wildlife in action on your next safari, turning fleeting moments into lasting memories.
4. Composition and Storytelling
Capturing stunning safari photography goes beyond simply pointing your camera and clicking. While technical proficiency is a foundation, it's thoughtful composition and storytelling that truly elevates your images from snapshots to works of art. This element is crucial for any aspiring wildlife photographer, especially when trying to convey the magic of a safari. By mastering composition, you can transform simple documentation into compelling visuals that evoke emotion, showcase animal behavior, and capture the essence of the wild. This is why it deserves a prominent place in any list of safari photography tips.
Learn more about Composition and Storytelling
Composition, in essence, is the deliberate arrangement of elements within your frame. In the context of safari photography, this means considering the placement of your subject (the animal), its environment, and other visual elements to create a balanced and engaging image. Storytelling, on the other hand, is about using those compositional elements to convey a narrative, to capture a moment, a feeling, or a relationship within the wild.
Features to consider for effective composition and storytelling:
- Rule of Thirds: Imagine your frame divided into nine equal sections by two horizontal and two vertical lines. Placing your subject at the intersection of these lines often creates a more dynamic and visually appealing image.
- Environmental Context: Including the surrounding environment, whether it's the vast savanna or dense bush, provides context and scale, enriching the story behind the image.
- Behavioral Moments: Capturing animals interacting with their environment, playing, hunting, or displaying social behaviors adds depth and intrigue.
- Eye Contact: Establishing eye contact with your subject creates a powerful connection with the viewer, drawing them into the image and making it more intimate.
- Negative Space: The empty space around your subject, called negative space, can emphasize the subject and create a sense of isolation, vastness, or freedom.
- Leading Lines: Natural lines like rivers, paths, or even the horizon can guide the viewer's eye towards your subject, creating a sense of depth and movement.
- Scale and Perspective: Showcasing the sheer size of an elephant against the backdrop of the African plains, or the delicate features of a tiny insect on a leaf, provides a sense of scale and wonder.
Examples of Successful Implementation:
- A wide shot of a lone elephant silhouetted against the vast African savanna, showcasing its scale and the immensity of its habitat.
- An intimate portrait of a lion cub, with direct eye contact, capturing its vulnerability and innocence.
- A group of zebras, their stripes creating mesmerizing patterns against the golden grasslands.
- A tender moment between a mother rhino and her calf, illustrating the nurturing bond between them.
Pros of focusing on composition and storytelling:
- Creates more engaging and memorable images.
- Elevates your safari photography beyond simple documentation.
- Helps convey animal behavior and personality.
- Increases the emotional impact of your images.
- Shows the intricate relationship between animals and their environment.
Cons:
- Requires patience and observation.
- May mean missing some shots while waiting for the perfect moment.
- Needs some knowledge of animal behavior to anticipate key moments.
Actionable Tips for Safari Photography Composition:
- Leave space for animals to 'move into' the frame: Anticipate their movement and leave room for them to "walk" or "look" into the image.
- Include the environment to tell the complete story: Capture the context in which the animals live.
- Wait for eye contact for portraits: This creates a powerful connection with the viewer.
- Look for interaction between animals: These moments offer compelling narratives.
- Observe animal behavior before shooting: Understanding their habits will help you anticipate photo opportunities.
- Consider both tight portraits and environmental shots: Offer a varied perspective of the wildlife.
- Use leading lines like paths or rivers: Draw the viewer's eye towards your subject.
- Try shooting from different heights and perspectives: Get creative with your angles for more dynamic images.
Photographers like Nick Brandt, with his artistic approach to wildlife photography, David Yarrow's dramatic black and white compositions, and Beverly Joubert's storytelling approach, have popularized this compositional style, showcasing its power in capturing the true essence of the wild. By implementing these safari photography tips, you too can create stunning images that tell compelling stories of your African adventure.
5. Pack Proper Supporting Equipment
Capturing breathtaking wildlife on safari requires more than just a good camera and lens. Safari photography often presents challenging conditions—from bumpy jeep rides and dusty plains to unpredictable weather and long days in the field. Packing the right supporting equipment can be the critical factor that separates a successful shoot from a frustrating one. This is crucial for securing stunning images and preserving your valuable gear. Learn more about Pack Proper Supporting Equipment
Essential supporting equipment for a safari photography trip includes:
- Bean Bags for Stabilization: These are invaluable for achieving sharp images, especially when shooting from a moving vehicle. A bean bag placed on the vehicle's door frame or windowsill provides a stable platform for your telephoto lens, minimizing vibrations.
- Dust Protection Gear: Dust is a constant companion on safari. Protecting your gear with dust-proof camera bags, lens covers, and even specialized camera housings can prevent damage and ensure optimal performance. Silica gel packets inside your bag will further help to absorb moisture and prevent fungal growth.
- Extra Batteries and Memory Cards: Long game drives and limited access to power necessitate carrying ample запасные batteries and memory cards. You don't want to miss that perfect lioness stalking her prey because you ran out of power or storage.
- Lens Cleaning Equipment: Dust, fingerprints, and even stray raindrops can compromise image quality. Microfiber cloths, a lens cleaning pen, and an air blower are essential for maintaining a pristine lens.
- Camera Rain Covers: Sudden downpours can occur even in dry seasons. A waterproof camera cover will protect your equipment from unexpected showers.
- Lightweight Tripod or Monopod: While bulky tripods can be cumbersome on safari, a lightweight version or a monopod can offer extra stability for low-light photography or video recording.
Pros:
- Improved Image Sharpness: Proper stabilization equipment like bean bags dramatically increases the sharpness of your images, especially with telephoto lenses.
- Protection in Harsh Conditions: Dust and rain protection safeguard your expensive equipment from damage.
- Extended Shooting Time: Ample batteries and memory cards allow you to capture all the action without interruption.
- Adaptability: Having a variety of supporting equipment allows you to adapt to different shooting scenarios.
Cons:
- Added Weight: Carrying extra gear increases the weight of your luggage.
- Extra Cost: Supporting equipment adds to the overall cost of your safari photography kit.
- Management Overhead: More equipment means more items to organize and keep track of.
- Airport Security: Some items, like tripods, might attract extra scrutiny at airport security.
Examples of Successful Implementation:
- Using a bean bag on your jeep's door to capture a sharp image of a cheetah in full sprint.
- Swapping out a depleted battery with a fresh one mid-game drive, ensuring you don't miss a moment.
- Protecting your camera with a dust cover during a sudden dust storm.
- Quickly changing lenses thanks to a well-organized camera bag with lens wraps.
Actionable Tips for Safari Photography Success:
- Bring a bean bag cover that you can fill locally with rice or beans to save on luggage space.
- Pack twice as many batteries and memory cards as you think you'll need.
- Use silica gel packets in your camera bag to absorb humidity.
- Carry microfiber cloths and an air blower for efficient dust removal.
- Invest in a dust-resistant camera bag for added protection.
- Use lens wraps for quick and easy lens protection.
- Pack a small flashlight for early morning and late evening game drives.
- Choose a comfortable camera strap to prevent neck strain during long days of shooting.
This meticulous approach to supporting equipment, popularized by professional wildlife photographers like Andy Biggs and Moose Peterson and reflected in the design of safari-specific camera bags from brands like Think Tank and LowePro, significantly enhances the quality and consistency of your safari photography experience. By being prepared for all contingencies, you can focus on capturing the magic of the African wilderness.
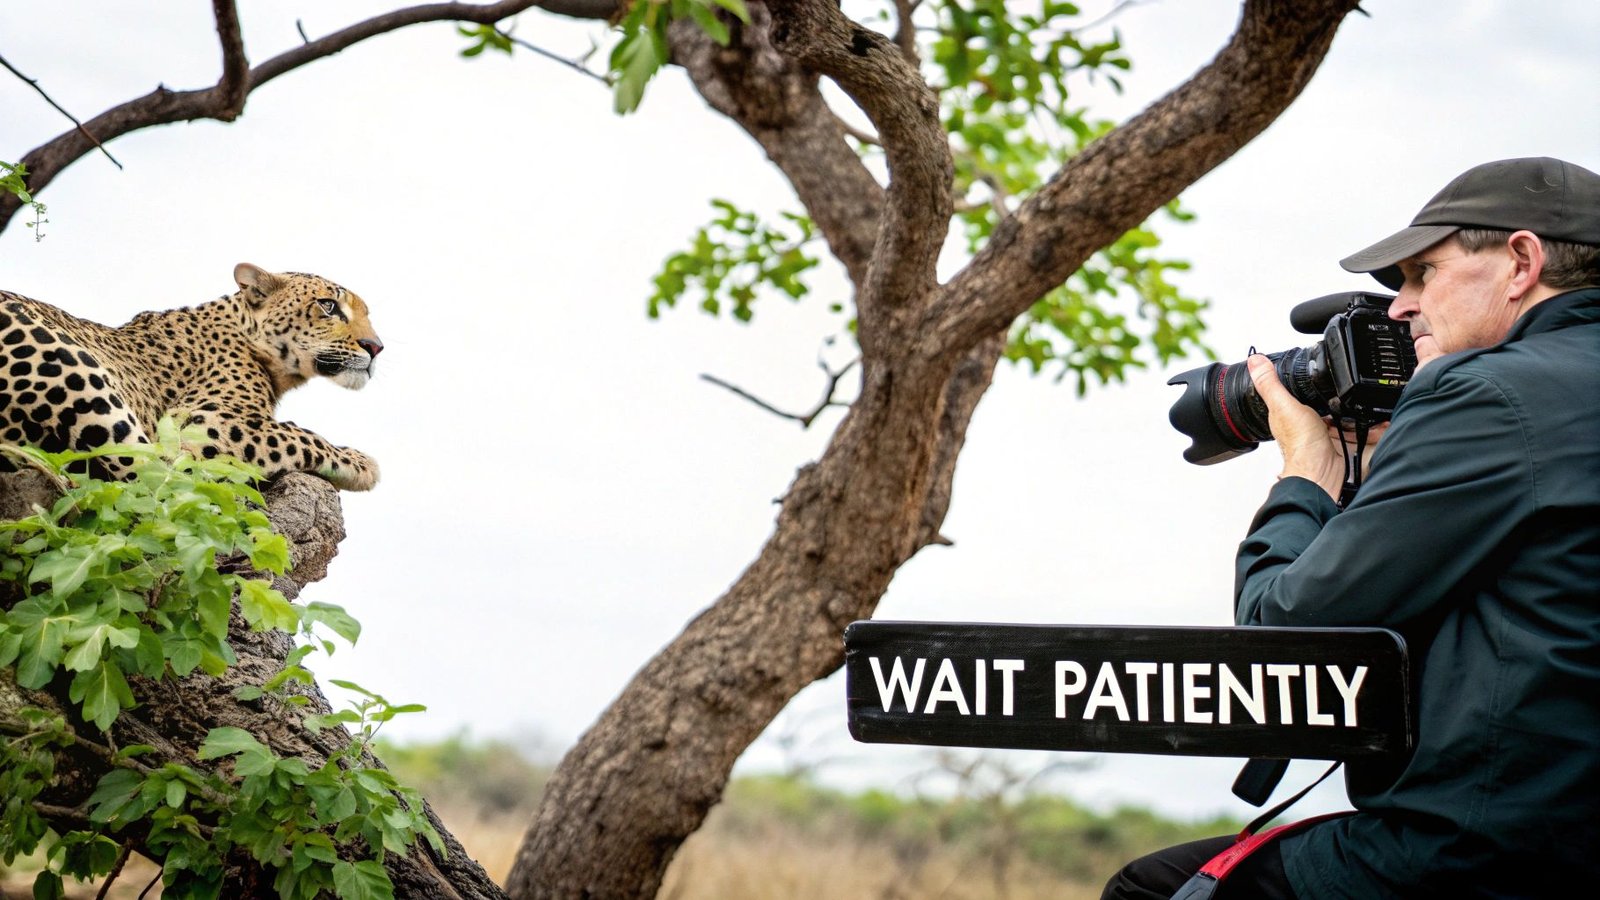
6. Patience and Observation: The Heart of Safari Photography
Patience and observation are arguably the most crucial safari photography tips, elevating your images from simple snapshots to captivating stories of the wild. This approach transcends the technical aspects of photography, emphasizing the development of a photographer's mindset and understanding of animal behavior. It’s less about having the best camera and more about honing your skills of observation and anticipation. This is why it deserves a prominent place in any list of essential safari photography tips.
This method hinges on the principle that truly remarkable wildlife photography is born from intimate knowledge and respect for your subjects. It involves deeply immersing yourself in the environment, learning to read the subtle cues nature provides, and waiting for the perfect moment to unfold. This might mean spending hours observing a lion pride's dynamics to anticipate a hunt, or recognizing the subtle pre-mating display preparations of a bird. It's about being present, attuned, and ready.
Features of this approach:
- Animal behavior knowledge: A deep understanding of animal behavior allows you to predict potential actions and positions yourself accordingly.
- Field observation skills: Sharpening your observation skills enables you to notice subtle changes in the environment and animal behavior, providing clues to impending action.
- Anticipation of action: This involves not just seeing what is happening, but anticipating what might happen next, based on your knowledge and observations.
- Reading environmental cues: Understanding how the environment influences animal behavior (e.g., wind direction, time of day, presence of other animals) is crucial for anticipating opportunities.
- Extended waiting periods: This is perhaps the most demanding aspect, requiring you to remain focused and ready, even during periods of apparent inactivity.
Pros:
- Results in more authentic and natural images: Patience allows you to capture genuine behaviors and interactions, untouched by human interference.
- Captures rare behaviors and interactions: By investing time and observation, you increase your chances of witnessing and documenting unique moments others might miss.
- Creates unique photos others might miss: Your dedication to patience will pay off with images that stand out from the typical tourist snapshots.
- Deepens appreciation of wildlife: Spending extended periods observing animals fosters a deeper connection and understanding of their lives.
- Leads to better storytelling: Patience allows you to capture a sequence of events, creating a more compelling narrative within your photographs.
Cons:
- Requires significant time investment: Capturing exceptional wildlife moments requires dedication and a willingness to wait.
- Can be physically demanding: Long hours in the field, often in challenging conditions, can take a toll.
- No guaranteed results: Despite your best efforts, wildlife is unpredictable, and there are no guarantees of capturing the perfect shot.
- Fewer total shots but higher quality: This approach prioritizes quality over quantity, resulting in a smaller portfolio of truly exceptional images.
Examples of successful implementation:
- Waiting patiently for hours for a leopard to descend from a tree with its kill, capturing the raw power and elegance of the predator.
- Observing a lion pride's dynamics throughout the day to anticipate their hunting behavior at dusk.
- Recognizing the subtle behavioral cues of a bird preparing for its elaborate mating display, allowing you to capture the peak moment.
Actionable Tips for Utilizing Patience and Observation:
- Research animal behavior before your trip: Familiarize yourself with the habits and behaviors of the species you hope to photograph.
- Ask guides about animal patterns and territories: Local guides possess invaluable knowledge about animal movements and behavior.
- Learn to recognize pre-action cues (ear positions, body language): Subtle changes in an animal's posture or behavior can signal impending action.
- Be fully prepared when action seems imminent: Ensure your camera settings are correct and you are in the optimal position to capture the moment.
- Don't put your camera away during 'quiet' periods: Some of the most captivating moments occur when you least expect them.
- Spend more time with fewer subjects rather than racing to see everything: Focus your energy on observing a few key species in depth.
- Return to promising locations multiple times: Repeated visits increase your chances of witnessing interesting behavior.
- Stay longer at sightings after other vehicles leave: Often, the most rewarding moments occur after the initial flurry of activity has subsided.
Popularized by: The long-term studies of filmmakers and conservationists like Dereck and Beverly Joubert exemplify the power of patience and observation in wildlife documentation. Similarly, photographers who specialize in single species, like Hannes Lochner (leopards), demonstrate the depth of understanding that comes from dedicated observation.
By embracing patience and observation, you'll not only improve your safari photography but also deepen your connection with the natural world, transforming your safari into a truly enriching experience.
7. Post-Processing for Wildlife Impact
Your safari photography adventure doesn't end when you pack your camera bag. In fact, the journey to truly captivating wildlife images continues with post-processing. This crucial step allows you to refine and enhance the raw beauty you captured in the field, maximizing the impact of your safari photography and creating a portfolio that truly tells a story. Thoughtful, ethical post-processing is key – we’re talking about enhancing reality, not creating it. Knowing how to work with your RAW files to showcase the natural splendor of wildlife without over-manipulating the images is a critical skill for any aspiring wildlife photographer. This is why post-processing deserves its place among the top safari photography tips.
What is it and how does it work?
Post-processing involves using software to adjust and refine your images after they've been taken. This encompasses a wide range of techniques, from basic corrections like color calibration and dust spot removal to more advanced adjustments such as selective sharpening, noise reduction, and dodging and burning. Working with RAW files gives you the maximum flexibility to adjust exposure, contrast, white balance, and other parameters without degrading the image quality, as RAW files contain significantly more data than JPEGs.
Features and Benefits:
- RAW file processing: The foundation of effective post-processing. RAW files give you unparalleled control over your images.
- Selective adjustments: Target specific areas of your image for enhancement, allowing for precise control over elements like light and shadow.
- Ethical editing practices: Maintaining the authenticity of your wildlife images is paramount. Post-processing should enhance, not fabricate.
- Color calibration: Ensuring accurate and vibrant colors that truly represent the scene.
- Dust spot removal: Easily eliminate distracting dust spots that may have appeared on your sensor.
- Noise reduction for high ISO shots: Minimize the graininess that can occur when shooting in low-light conditions, preserving image detail.
Pros:
- Enhances the natural beauty already captured in your photos.
- Corrects technical limitations of cameras, such as exposure and white balance issues.
- Creates cohesive image collections, even when shot in varying lighting conditions.
- Recovers detail from challenging lighting situations, revealing nuances in shadows and highlights.
- Allows for creative interpretation while maintaining the integrity of the wildlife subject.
Cons:
- Can be a time-consuming process, requiring patience and attention to detail.
- There’s a learning curve for mastering post-processing software.
- Over-processing is a risk, leading to unnatural-looking images.
- Requires investment in additional software like Adobe Lightroom or Capture One Pro.
Examples of Successful Implementation:
- Enhancing the golden light on a lion's mane, making it truly glow.
- Recovering shadow detail in high-contrast scenes, revealing the intricate textures of an elephant's skin.
- Creating a cohesive look across a portfolio from different lighting conditions, providing a unified aesthetic.
- Subtle dodge and burn to emphasize animal features, such as the eyes or the texture of fur.
Actionable Tips for Safari Photography Post-Processing:
- Always shoot in RAW format: This provides maximum flexibility for editing and ensures the highest quality results.
- Create a standard workflow: Develop a consistent process for editing your images to ensure consistent results and save time.
- Use selective adjustments rather than global changes: This allows for precise control and prevents over-processing.
- Maintain natural-looking colors and contrast: Avoid pushing these elements too far, as it can make images look artificial.
- Be subtle with clarity and texture enhancements: Overdoing these can create an unnatural, gritty look.
- Use noise reduction appropriately for high ISO images: Too much noise reduction can result in a loss of detail.
- Consider the emotional impact of color versus black and white: Experiment with both to see which best conveys the mood and story of your image.
- Create virtual copies to experiment with different looks: This allows you to try various editing styles without affecting the original file.
- Develop a consistent style that becomes your signature: This can help your work stand out and become recognizable.
Inspiration from the Masters:
Look to the work of acclaimed wildlife photographers like Frans Lanting, known for his distinctive color palette, and Nick Brandt, whose dramatic black and white processing evokes powerful emotions. The winning images from competitions like the Wildlife Photographer of the Year also provide excellent examples of effective and ethical post-processing techniques.
By mastering post-processing techniques, you can elevate your safari photography from simple snapshots to powerful, emotive works of art that truly capture the essence of the wildlife you encountered. This is a crucial step in showcasing the beauty and power of the natural world, leaving a lasting impact on viewers and contributing to conservation efforts through compelling visuals.
7-Point Safari Photography Strategy Comparison
| Title | Implementation Complexity 🔄 | Resource Requirements ⚡ | Expected Outcomes 📊 | Ideal Use Cases 💡 | Key Advantages ⭐ |
|---|---|---|---|---|---|
| Use the Right Lenses | Moderate – requires telephoto operation practice | High – expensive lenses with stabilization & accessories | High-impact captures with detailed subject isolation | Best for distant wildlife photography in open spaces | Safely isolates subjects with compression & fine details |
| Master the Golden Hours | Low – primarily planning and timing | Low – standard gear with readiness for early hours | Warm, soft light that enhances moods and colors | Ideal for landscapes and portraits during sunrise/sunset | Creates natural mood and vibrant imagery |
| Optimize Camera Settings for Wildlife Action | Moderate – involves adjusting advanced camera settings | Moderate – uses in-camera features without extra gear | Sharp, freeze-frame images of fast-moving wildlife | Perfect for capturing fast action and fleeting moments | Reduces motion blur and maximizes chance for perfect shots |
| Composition and Storytelling | Moderate – needs artistic eye and patience | Low – uses existing equipment with focused framing strategy | Engaging images that narrate animal behavior and context | Suited for scenes where emotion and context matter | Elevates photos beyond documentation with narrative depth |
| Pack Proper Supporting Equipment | Low – involves pre-trip planning and organization | Moderate – additional gear like bean bags, extra batteries | Improved stability and protection in challenging conditions | Essential in harsh environments and bumpy vehicle scenarios | Enhances adaptability and gear protection during shoots |
| Patience and Observation | High – requires discipline and long waiting periods | Low – relies on observation skills over extra equipment | Authentic moments capturing rare behaviors | Best when animal movements and subtle interactions require focus | Yields natural, story-driven imagery through keen observation |
| Post-Processing for Wildlife Impact | High – demands advanced editing skills and workflow | Moderate – investment in software and time-consuming adjustments | Enhanced image details while maintaining authenticity | Ideal for crafting a cohesive final portfolio and signature style | Recovers details and corrects limitations for artistic results |
Crafting Your Safari Photography Legacy
Mastering these seven safari photography tips—choosing the right lenses, utilizing the golden hours, optimizing camera settings, focusing on composition and storytelling, packing the proper supporting equipment, practicing patience and observation, and perfecting post-processing techniques—will significantly elevate your wildlife photography. These aren't just technical skills; they are the building blocks for capturing truly breathtaking images that convey the raw power and delicate balance of the African wilderness. Remember, the most impactful safari photography comes from a deep respect for the environment and its inhabitants. Every photograph is an opportunity to not just document, but to connect with and conserve the wild.
By applying these safari photography tips, you transform a fleeting moment into a lasting memory, a personal connection to a world few have the privilege to witness. Your photographs become more than just images; they become stories, a legacy of your safari adventure that you can share and cherish for years to come.
Ready to embark on your own photographic safari and capture the magic of Africa's iconic wildlife? Maximum Adventure Trails specializes in curated safari experiences to locations like Victoria Falls, Hwange National Park, and the Okavango Delta, providing you with unparalleled photographic opportunities and expert guidance. Visit Maximum Adventure Trails today to begin planning your dream safari and put these safari photography tips into action.